Using Layers
Layers help you to organize your configuration. Each configuration can have multiple layers where analysis is run individually.
Calculated signals are included as an extra layer in the configuration.
You can perform the following actions:
- To create a new layer
- To color a layer
- To duplicate a layer
- To rename a layer
- To reorder layers
- To switch to a specific layer
- To add a comment to a layer
- To delete a single layer
- To delete several layers
 Import and Layer Handling.
- Do one of the following:
On the right of the layer tabs, click the plus symbol.
Alternatively, you can right-click one of the layer tabs and select Add.
In the Configuration Manager, right-click a configuration and select Add Layer.
A new layer is added to the current configuration.
-
Enter a name for the layer. The name can consist of up to 256 characters. If the name is not valid, it is displayed with a red frame. Refer to the tooltip
 Information on a concrete object (e.g. a measure file or an icon) that is shown when hovering over that object. for further information.
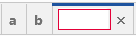
If you do not enter a name, the name is set to "Layer" by default. If the name is already in use, it is extended by an increasing number.
To facilitate the differentiation of the layer tabs, the background color of a layer tab can be defined.
- Right-click the layer tab.
-
In the context menu click Properties.
- Select the desired background color.
Only the lower area of a layer tab will be colored and the offered colors are limited, both to ensure a good readability of the layer name.
Within the active configuration, do the following:
-
On the layer tab, right-click and select Duplicate.
The duplicated layer appears right from the active layer. The name is made unique by adding "(1)".
In between different configurations, do the following:
- In the Configuration Manager, right-click one or more layers and choose Copy.
- If you want to copy the layers into another configuration, select this configuration. For more information, see To select the active configuration.
-
In the Configuration Manager, right-click the configuration and choose Paste.
The layers are added. If the name is already in use, it is extended by an increasing number. If you have selected a configuration in which the measure file is not available, the signals of these newly added layers are indicated as 'no-match' signals. To avoid a 'no-match' situation, an automatic signal mapping is performed in case the "Copy" source and the "Paste" target contain both exactly one measure file.
- Do one of the following:
- On the layer tab, double-click the layer name.
- On the layer tab, right-click the layer name and select Rename.
- In the Configuration Manager, right-click the layer name and select Rename.
- Enter the new name. The name can consist of up to 256 characters. If the name is not valid, it is displayed with a red frame.
-
Move a layer by dragging its tab header to the new position within the current configuration. You cannot drag a layer to another configuration.
If you move the layer to the left or right border, the tabs scroll in the respective direction. After scrolling, the new position is indicated.

-
Release the mouse button.
The tab is displayed at the new position.
- Do one of the following:
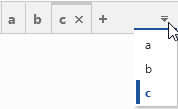
On the right of the layer tabs, click the drop-down menu.
A list with all layers of the same tab arrangement is displayed in alphabetical order. If you click an entry of this list, the selected layer is displayed in the foreground of the configuration.
To scroll the layer tabs to the left or right, use the arrow symbols next to the drop-down menu.
Alternatively, you can use the mouse wheel for scrolling.
You can enter additional information for a layer. For example, you can describe and document for what a specific layer is meant.
-
Select a layer tab or a layer entry In the Configuration Manager, right-click the layer and select About Layer. Alternatively, press Ctrl+I.
The Information Window opens.
-
Enter your comment (up to 10,000 characters).
When the focus is no longer on the Information window, a symbol
 appears on the layer itself and in the Configuration Manager.
To add comments to a configuration, see Adding Configuration Comments
- Do one of the following:
-
On the layer tab of the active layer, click
 .
.
- On the layer tab, right-click the layer name and select Remove.
- In the Configuration Manager, right-click the layer name and select Remove.
-
On the layer tab of the active layer, click
- Right-click a layer tab.
- Choose one of the following entries:
- Remove All Layers But This
- Remove All Layers
If all existing layers have been deleted, a new default layer is created.