Defining a Time Offset for a Measure File
Working with several measure files usually requires to align the time line of the different files such that the actual data can be compared.
 Using the Time Offset.
You can perform the following actions:
To apply a time offset by shifting a signal curve
-
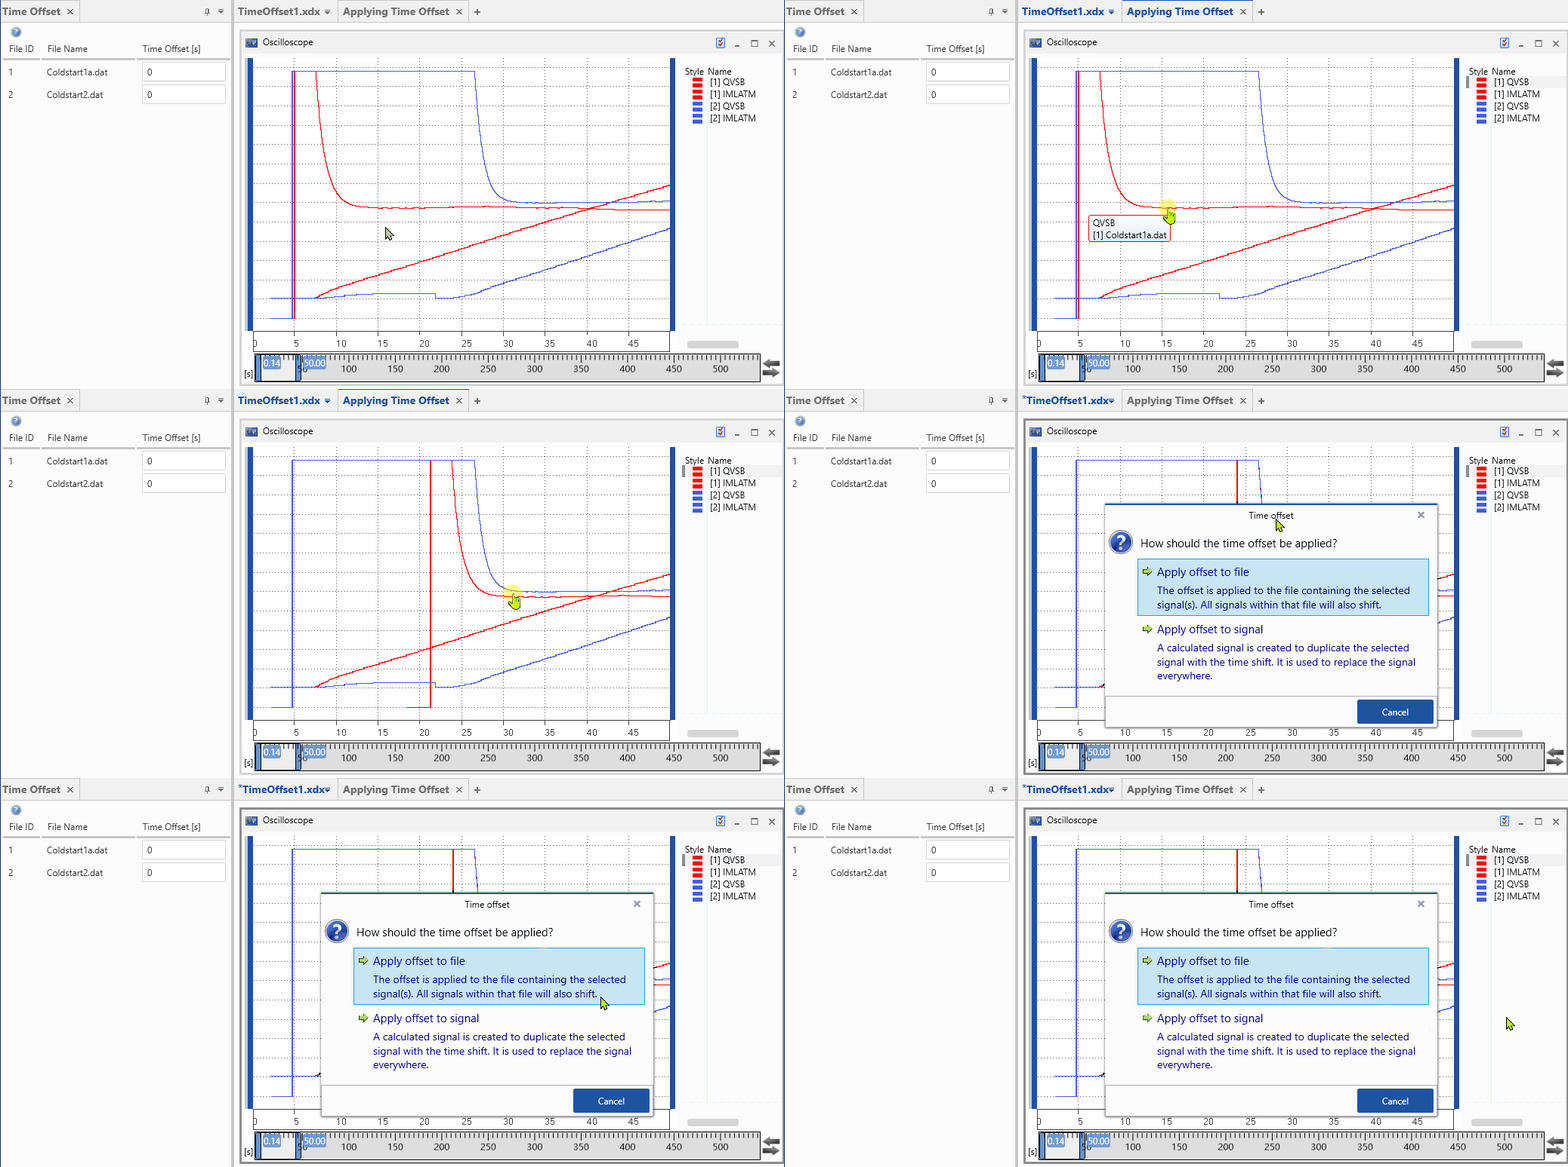
In the oscilloscope, select the signal that you want to shift. You can define later whether it is a representative for a file or it shall be shifted individually.
-
Press Shift and drag the signal curve to the desired position.
-
Confirm one of the following options:
-
Apply Offset to File
The time offset is applied to the whole measure file, i. e. it affects all signals of the file. The numerical offset value is displayed in the Time Offset window.

-
Apply Offset to Signal
For the shifted signal, a calculated signal will be created, which gets the shift applied as time offset in the Output Options of the Calculated Signal window. Subsequently, the calculated signal with the time offset will be used to replace the input signal everywhere in the configuration, i.e. in all instruments and when it is used as input of a calculated signal.
Note that for a calculated signal the individual time offset and the file time offset of its input signal(s) are cumulated.
-
To apply a time offset in the Time Offset window
-
In the Time Offset window, the available measure files with their identifiers are listed. Enter the required time shift in seconds for the respective file. Positive or negative values as well as decimals are allowed.
To apply a time offset for individual signals, see Defining Calculated Signals.
-
Click Apply.
For all signals from the same file, the samples are shifted accordingly. The shifted data is also used for calculated signals. Note that if you replace the measure file with another one, the defined time offset remains still the same.