Manual ODCM Front End
Extra menu > Open ODCM Front End
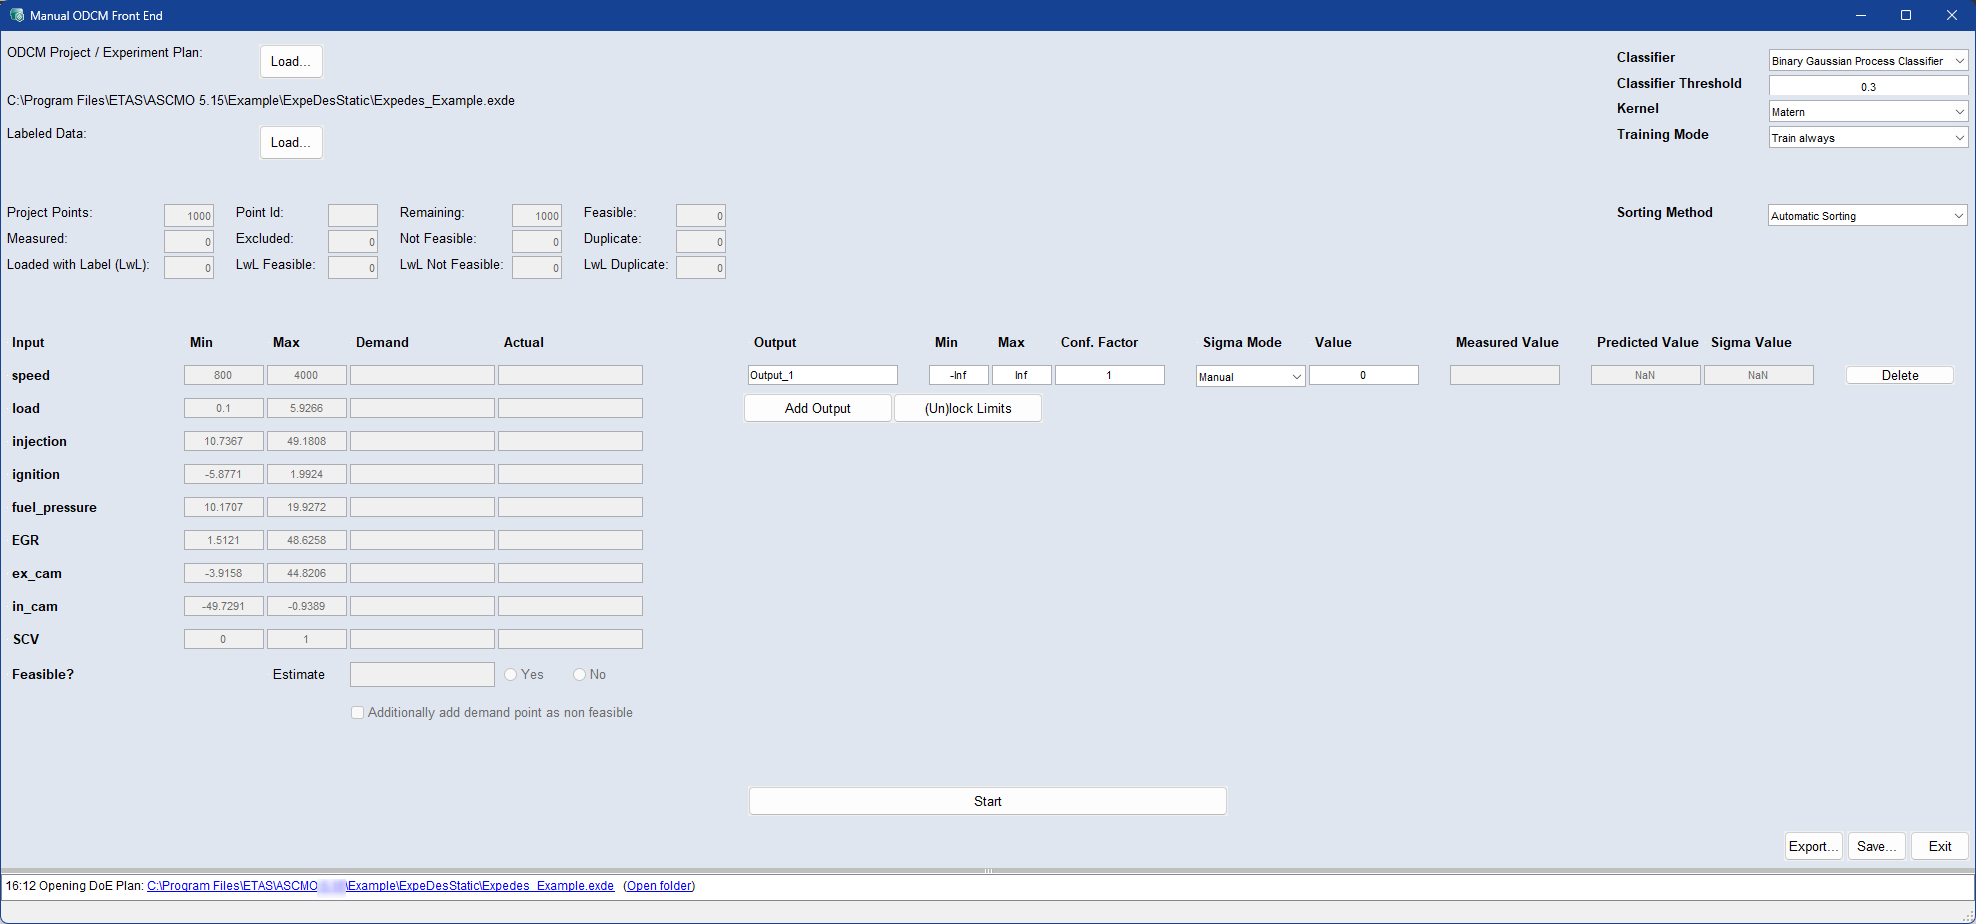
The Manual ODCM Front End window allows you to train the classification model by manually entering the feasible/non-feasible points and contains the following elements:
At start up, the experiment plan is taken from the ASCMO-STATIC ExpeDes project.
ODCM Project/Experiment Plan:  Load
Load
Click to load an experiment plan other than the current ASCMO-STATIC ExpeDes project. You can also load a saved Manual ODCM Front End project (*.odcm) or load the experiment plan from an Excel or CSV file.
Meta data
Displays the path of the project being used.
Labeled Data: Load
Click to import an existing design that already contains information about feasible/non-feasible points. The loaded Excel or CSV file requires, in addition to the inputs, an additional column (label) Feasible with the content 1 or 0. This data is used to train the classification model before starting further measurements.
Classifier
Must be selected before starting the measurement campaign.
-
Default: Selects the Binary Gaussian Process Classifier and resets its settings.
-
Binary Gaussian Process Classifier: Is the default classifier. The model training directly minimizes the RMSE.
-
Gaussian Process: The model training maximizes the log likelihood.
-
Random Decision Tree Classifier
Classifier Threshold
All measurement points with a classification probability below the threshold are skipped in the measurement campaign. Enter a threshold value at which you want the classifier to take effect. A higher value will result in more deleted points.
Kernel
Must be selected before starting the measurement campaign.
The internal kernel used by the classifier algorithm.
Maternal is the default kernel, which allows better modeling of local dynamics compared to the second option Squared Exponential kernel, which is smoother.
Training Mode
Must be selected before starting the measurement campaign.
-
Train always: Full model training for each new data point.
-
Fast Mode: Full training for the first N data points only.
-
Train if time budget available: Full retraining if time budget allows.
No. normal trainings/Time budget
Must be selected before starting the measurement campaign.
-
Set the number of measurements before switching from full training mode to fast training mode. Integer ≥ 100.
-
Set the time budget, which determines whether to use full or fast mode training for each new measurement, depending on the accumulated time budget (in seconds) available. Each measurement adds to the time budget. When the accumulated time budget is greater than the time for the last full model training, a new full model training is performed.
Sorting Method
The sorting method must be selected before starting the measurement campaign.
Automatic Sorting (recommended): ODCM automatically manages the optimal sorting strategy.
Expedes Sorting: The sorting defined in the ASCMO-STATIC ExpeDes plan is used. This is usually not recommended as it reduces the flexibility and effectiveness of the ODCM algorithm.
Input
Input name: Name of the input as defined in the experiment plan.
Min/Max: Minimum and maximum values of the input, as specified in the experiment plan.
Demand: Target value for the current measurement point, based on the experiment plan.
Actual: Enter the actual measured input value for the current point.
Add Output
ODCM allows measurement points to be skipped depending on a predicted output being outside a limit. In addition, points can be skipped according to a sigma threshold.
Output: Give the output a unique name.
Min/Max: The interval from min to max defines the acceptable output range, inputs that produce values outside the interval [min-factor*sigma, max+factor*sigma] are skipped. The condition is empty if the limits are set to [-Inf, Inf].
Confidence Factor: If output limits are set, the output is checked to see if it is within the limits [min-confidence factor*sigma, max+confidence factor*sigma], with sigma taken from the internal output model.
Sigma Mode: Select one of the following options from the drop-down list:
-
Manual: A confidence threshold can be set for sigma as an absolute value in the range [0,∞). Inputs resulting in a sigma value below the threshold are considered skipping candidates. An input is skipped if, for all outputs, it qualifies as a skipping candidate with respect to the corresponding sigma threshold.
-
Auto: The confidence threshold is determined automatically. This is a value in the range [0,1] that balances modeling quality and the number of required measurements—lower values prioritize higher modeling quality, while higher values reduce the number of measurements. It is recommended to use this feature with ExpeDes blocks. The default value is 0.9.
Value: Displays a value based on the selected sigma mode. In Manual mode, it represents the user-defined confidence threshold (>=0). In Auto mode, it is a number between 0 and 1 specifiying the tradeoff between modeling quality and the number of measurements.
Measured Value: Enter the actual measured output value for the current point.
Predicted Value: Output value predicted by the model at the current measurement point.
Sigma Value: Model uncertainty (sigma) of the output at the current measurement point.
Delete: Deletes the output from the list.
Add Output: Adds a new output row.
(Un)lock limits: Locks and unlocks the limits and thresholds for the outputs.
Start
Click to start manually entering the feasible/non-feasible points.
 GUI
GUI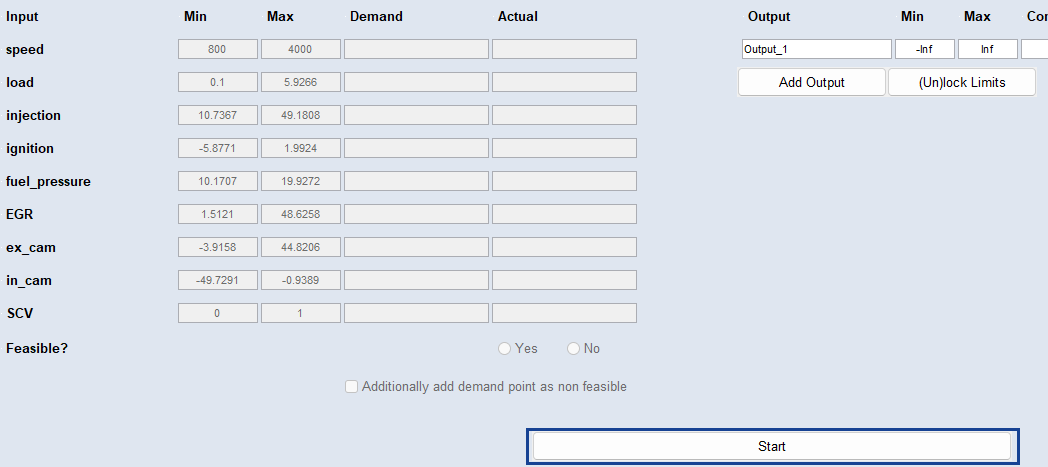
You are presented with the first point of the measurement campaign.
Measure the point and then enter the feasible/non-feasible information using the Feasible? Yes and No radio buttons.
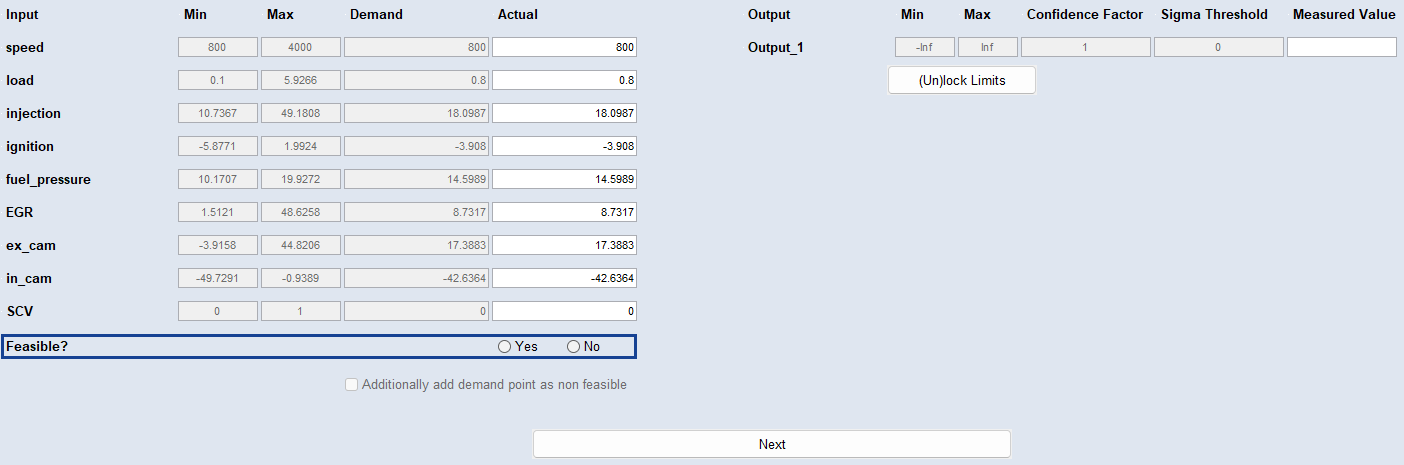
Next
Click to move to the next point in the measurement campaign.
|
Note |
|---|
|
The demand and the actual measured point may differ for two reasons:
|
Export
Click to export the current state of the measurement campaign as an Excel or CSV file.
Save
Click to export the current state of the measurement campaign as ODCM file.
Exit
Discards your settings and closes the window.
See also