NARX Feature Search
Model > NARX Feature Search
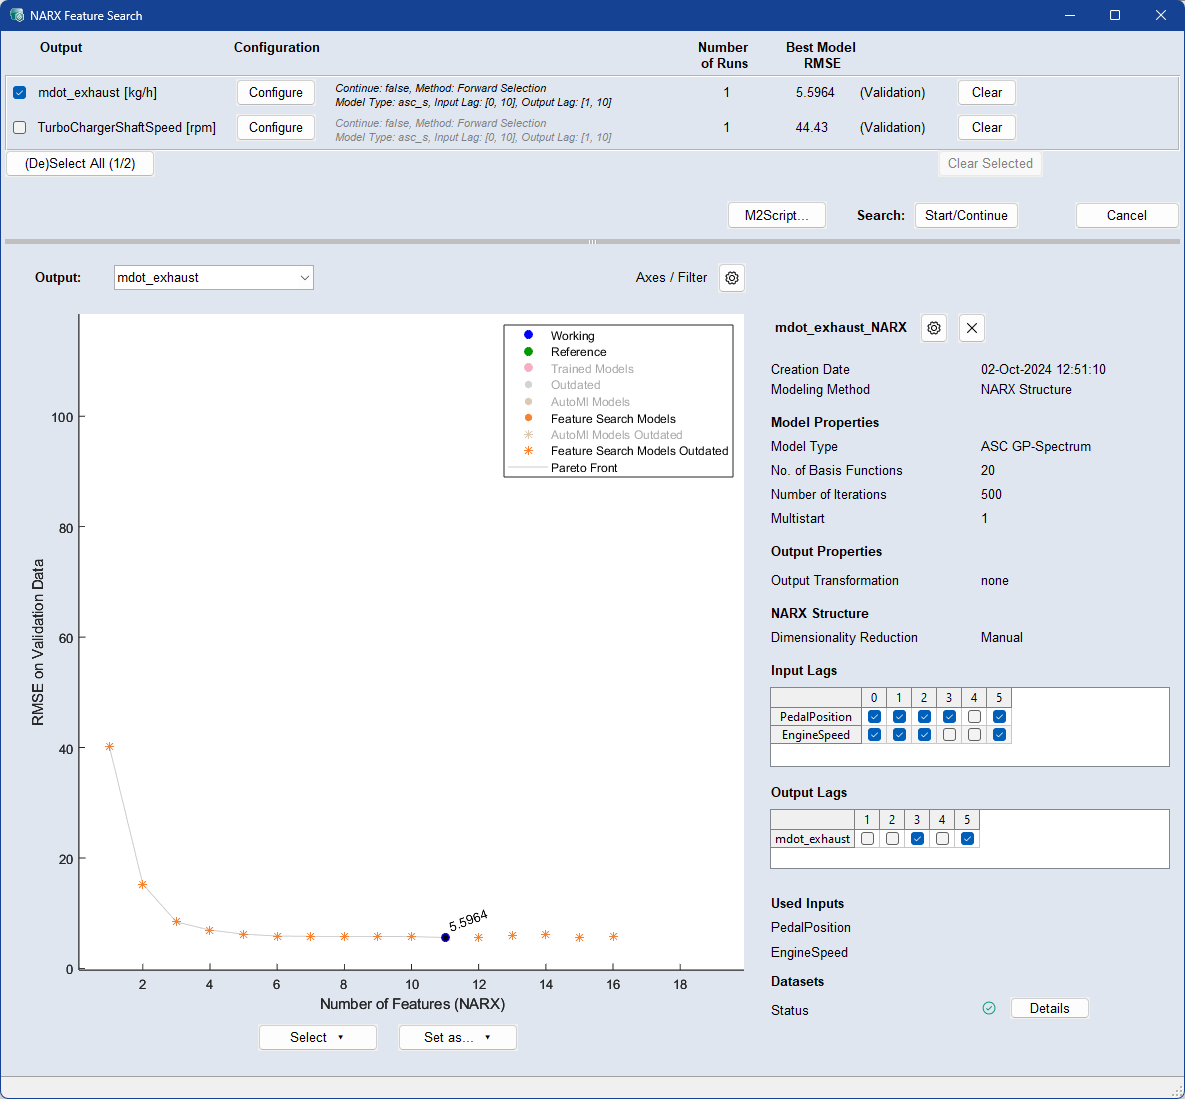
The NARX Feature Search window contains the following elements:
Outputs area
This section lists the outputs that can be used for the NARX Feature Search.
Activate the corresponding checkbox to use the output for the NARX Feature Search.
 (De)Select All
Click to use or deselect all outputs for the NARX Feature Search.
Configure
Click to open the Configure Automatic Feature Selection <output>.
The meta data of the configuration is displayed, as well as the Number of Runs and the Best Model RMSE.
Clear
Click to clear the training results for the output.
Clear Selected
Click to clear the results of all selected outputs.
Export Job to M Script
Click to export the current settings as a MATLAB® script file (*.m) for automation.
Start/Continue
Click to start or continue the NARX feature search.
Cancel
Discards your settings and closes the window.
Model Manager area
Output
Select the output for which the models are to be displayed.
Axis / Filter ![]()
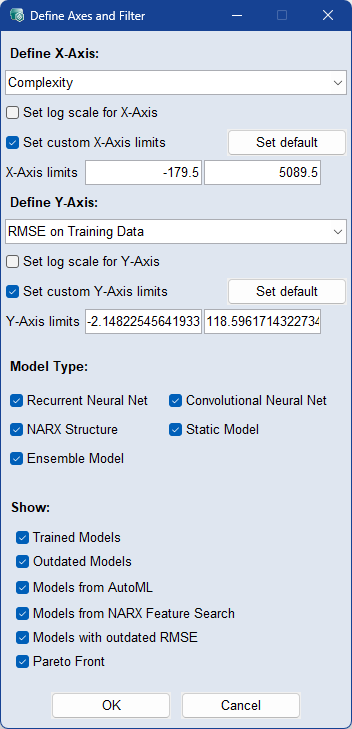
Opens the  Define Axes and Filter window:
|
Note |
|---|
|
Only models with NARX structure are available for NARX Feature Search. |
-
Define Axis area
-
In the drop-downs, select what you want to be defined as X- and Y-Axis. Available options are Complexity, RMSE on Training/Validation/Test/All Data, Number of Features (NARX), and Creation Order.
-
Set Log Scale for *-Axis: Activate the checkbox to use a logarithmic scale on the axis.
-
Set Custom *-Axis Limits: Activate the checkbox to set custom axis limits. Use Set Default to set the default axis limits.
-
-
Define Filter area
-
Model Type: Activate the checkboxes of the model types you want to be displayed in the graph.
-
Show: Activate the checkboxes of the model types you want to be displayed in the graph.
-
-
OK: Applies your settings and closes the window.
-
Cancel: Discards your settings and closes the window.
Plot
The models are represented in the graph by different symbols explained in the legend.
A model is outdated if the data has been changed after the model has been trained.
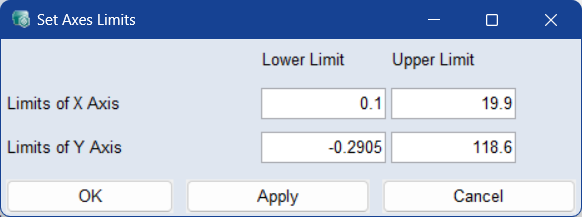
Right-click a model to open its context menu:

Set Limits: Opens the Set Axes Limits window, where you can set the upper and lower limits of the X, Y1, and Y2 axes to the exact values.
Delete Selected Configuration: Deletes the selected model/configuration. You are asked whether the model or the complete configuration should be deleted from your current project. If you have selected a point that was trained but was never used, it is an unnamed configuration that can only be deleted entirely.
Set as Working: Set selected model as working model.
Set as Reference: Set selected model as reference model.
Model
Select a model in the graph by clicking on it, the name and settings are displayed on the right.
![]() Opens the
Model Configurations (ASCMO-DYNAMIC) window of the model selected in the graph. If you edit a model in the window and click OK, a new model will be trained and displayed directly in the graph.
Opens the
Model Configurations (ASCMO-DYNAMIC) window of the model selected in the graph. If you edit a model in the window and click OK, a new model will be trained and displayed directly in the graph.
 Deletes the selected model/configuration. You are asked whether the model or the complete configuration should be deleted from your current project. If you have selected a point that was trained but was never used, it is an unnamed configuration that can only be deleted entirely.
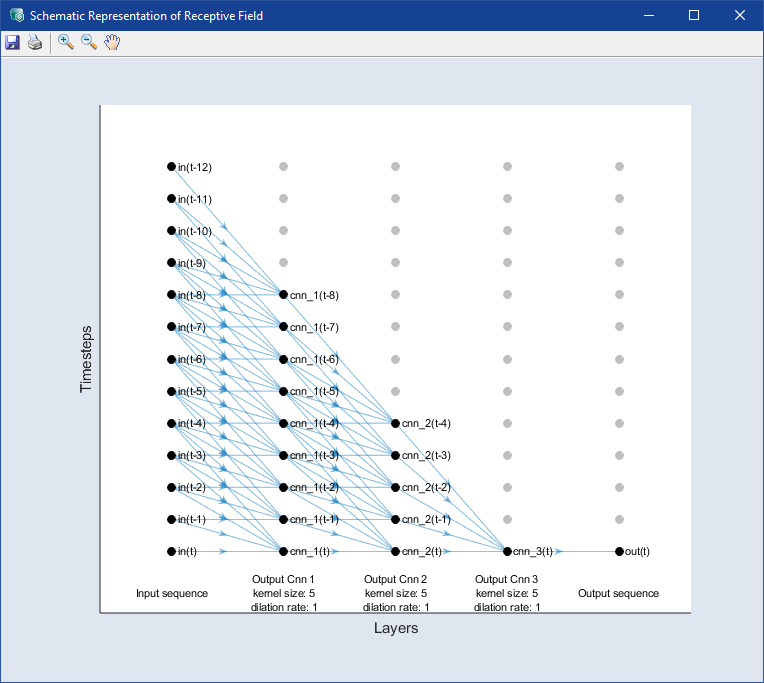
CNN models only:  Opens a schematic representation of the receptive field generated for the specified kernel size and dilation rate.
Datasets
The icon indicates the status of the model. Whether it is up to date or there have been changes after model training.
Click the Details button to see more information about the dataset status.
Select
Click Select > Working Model/Reference Model to select the working or reference model.
Set as
Select a model in the graph by clicking on it, and click Set as > Working Model/Reference Model to set it as the current working or reference model for the output.
See also
Configure Automatic Feature Selection <output>