Checking out a Configuration (Advanced Mode)
Note |
|---|
By default, the Simple Mode user interface is used for checkout. To check out configurations in Advanced Mode (as described below), deactivate the Simple Mode user interface first. |
The method for checking out a configuration is similar to the method for checking out items. Proceed as follows to check out an existing configuration:
In the SCM menu, point to Configuration Management and select Checkout Configuration.
The first page of the Checkout Configuration dialog box (Advanced Mode) is displayed.
In the Repository Content pane on the Step 1 of 5 page, select the configuration(s) you want to check out.
For Subversion, configurations are stored in files with the extension .scmconfiguration.amd.
You can enter a search string in the Search Criteria field to filter the Repository Content pane. The "*" (asterisk) wildcard is allowed at the beginning or at the end of the search string.
Click the >> button to copy the configuration(s) to the Selected Elements pane.
Click Next to display the Step 2 of 5 page.
This page provides a more detailed overview of the configuration(s) you selected for checking out. A double-click on a configuration in the Selected Elements pane opens the Item Details dialog box with further details for the configuration.
- If you want to activate a different revision, delete the one that is not ignored; the next item of the same ASCET OID will then be re-activated for import.
To check out a particular version of a configuration, proceed as follows.
Right-click the configuration and select Change Revision from the context menu.
The Select Revision of Configuration dialog box opens. It lists all available revisions.
- Select the revision you want to check out and click Ok.
The other options in the context menu for selected items enable you to view further details on the item, to remove/add the item from/to the current selection, and to compare the selected revision with the current status in the ASCET database/workspace.
Click Next to display the Step 3 of 5 page.
This page shows all item revisions contained in the selected configurations. Items can be deleted from the list. If multiple configurations are loaded in parallel, there might be several different revisions listed for the same (referenced) item. ASCET-SCM will only import one revision of each item. Double entries are grayed out and will be ignored.
Click the Checkout button to start the checkout.
If conflicts are detected, the Step 4 of 5 page opens. This page lists any conflicts detected (see also Conflicts Found Dialog Box). Items can be deleted from the list shown on this page.
 Proceed as follows.
If no conflicts are detected, the checkout is performed immediately.
Depending on the current setting of the Show Result Dialog option, the Step 5 of 5 page is displayed (see also Results Dialog Box).
Note
The base configuration item is always imported. It is not listed in the "conflict" list because ASCET-SCM assumes that selected configuration items are always to be replaced, regardless of their current revision status.
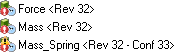
If the configuration you checked out was committed with a previous version, the items are marked as modified and the configuration is marked as invalid (see, e.g., the figure on the right). Note that you still need to lock the configuration before you can edit and/or commit it.
- If you want to view further details on the result of this operation for a given item, double-click on an item on the Step 5 of 5 page to display the Detailed Result Information dialog box.
- Click Close to complete the checkout operation.
See also