Using Cursors
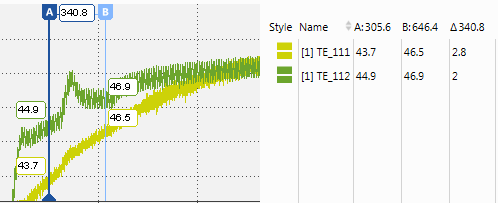
Cursors![]() Part in the graphical view of the oscilloscope to analyze y values, differences to other cursors, and time values. are used to get more precise values at certain time stamps. Moreover cursors enable to determine differences between samples values and in view of time. The oscilloscope shows directly in the graph the values of the signals at the time stamp of the cursors as well as the difference on the y-axis between the cursors.
Part in the graphical view of the oscilloscope to analyze y values, differences to other cursors, and time values. are used to get more precise values at certain time stamps. Moreover cursors enable to determine differences between samples values and in view of time. The oscilloscope shows directly in the graph the values of the signals at the time stamp of the cursors as well as the difference on the y-axis between the cursors.
For performance reasons, V8.7 initially shows a signal value based on the minimum value of the file index. As long as index data is used, a rounding symbol appears in front of the tooltips and in the cursor's column in the signal list. The rounding symbol automatically disappears as soon as the cursor is not moved anymore, then the exact values are loaded in the oscilloscope.
All cursor and sample values are displayed as separate columns in the signal list![]() List of signals that are assigned to an oscilloscope (later on maybe also for other instruments). The signal list is a separate widget showing signal values (e.g. values at the cursors) and some meta information. It can also be used for showing/hiding the signal.. Also, the value differences of the cursors are displayed. To avoid a change in size of the signal list when adding and removing cursors, the signal list size has to be adapted manually by moving the splitter bar between oscilloscope area and signal list.
List of signals that are assigned to an oscilloscope (later on maybe also for other instruments). The signal list is a separate widget showing signal values (e.g. values at the cursors) and some meta information. It can also be used for showing/hiding the signal.. Also, the value differences of the cursors are displayed. To avoid a change in size of the signal list when adding and removing cursors, the signal list size has to be adapted manually by moving the splitter bar between oscilloscope area and signal list.
You can perform the following actions:
- To show and hide cursors
- To delete cursors
- To move a cursor sample-wise
- To anchor a cursor to a position in the visible range
- To switch the synchronization cursor
- To hide and unhide the cursor's tooltips
- To copy the signal values at cursor's position
- To change the number of decimals of the cursor's tooltips
- To send the cursor time to EHANDBOOK-NAVIGATOR
- To move the cursor to a specific value
 Oscilloscope - Using Cursors.
-
To show cursor A, select Show/Hide Cursors in the cursors' drop-down menu
 .
. -
To show cursor B, repeat step 1.
The active cursor is indicated by the dark blue background color of the cursor label.
- If you want to use the other cursor as active cursor, press Ctrl+1.
- Click the icon again. This has the following effect:
- If both cursors have been in the visible area, they are hidden now.
- If one of the cursors has been outside the visible area, it is displayed now.
- To delete a specific cursor, select it and use delete in the context menu.
- To delete all cursors, even if not in the visible range, use Ctrl+Alt+R.
-
Note
If instrument synchronization is active, always one cursor must remain.
By default, the cursors' movement mode is time-based. You can change the movement mode to navigate a cursor from sample to sample. The selected mode is valid for all cursors in the oscilloscope.
-
Select Switch to Sample-wise Navigation in the cursors' drop-down menu
or use the tab Instrument in the Properties window.The cursor label changes into a round shape
 .
.Depending on the location of the cursor, the cursor's line is shown as follows:
- If the cursor is exactly on an existing sample, the cursor's line is solid.
- If the cursor is in-between two samples, the cursor's line is dashed.
-
To move a cursor to another sample, hover over the blue line and drag it to the new position. Alternatively, press Arrow Left or Arrow Right (the shortcut keys apply to the active cursor).
The cursor jumps to the closest sample of the current time stamp. For navigation, only samples of the currently active signals are considered. If no signal is selected in the signal list, all samples from all signals are taken into account.
If you move the cursor to a position where no sample is available, the tooltip next to the cursor label is marked in red indicating that the cursor cannot be moved in this direction any further.
To anchor a cursor to a position in the visible range
By default, cursors have a fixed time stamp and a variable screen position. When scrolling or zooming, the cursor moves with the signal curve. This means that the cursor can move outside the visible range. To keep the cursor in the visible range, you can anchor it.
-
Hover over the cursor label at the top of the cursor (A or B).
The character changes into an anchor symbol
 .
. -
Click the anchor symbol.
The cursor is fixed to the screen position. The cursor label shows the anchor symbol permanently.
- If you want to switch back to the non-anchored mode, click the cursor label again.
To switch the synchronization cursor
When synchronizing instruments, a synchronization cursor automatically appears in the oscilloscope. By default, the active cursor within the visible range is used as synchronization cursor. For more information, see Synchronization time stamp. Navigating in Instruments.
The synchronization cursor is marked by a synchronization symbol at the bottom of the cursor line  .
.
To switch the synchronization cursor, click the line of the other cursor. Alternatively, you can press Ctrl+1.
The cursor becomes active and is used as synchronization cursor. Thus, the time stamp that is used for indicating the synchronization changes in all other instruments. For example, in other oscilloscopes the synchronization cursor is also switched accordingly.
If you have selected the sample-wise navigation mode, the instrument in which you have performed the last action provides this sample information. In an oscilloscope, this is indicated by the dark blue background color of the cursor label. All other synchronized oscilloscopes are shown with transparent cursor labels ![]() .
.
To hide and unhide the cursor's tooltips
- Click or use the tab Instrument in the Properties window.
- To hide the tooltips, select Hide Cursor's Values Tooltips.
- To unhide them again, click and select the respective entry.
To copy the signal values at cursor's position
To copy the signal values from a specific point in time to the clipboard, do the following:
-
Show the cursor by selecting Show/Hide Cursors in the cursors' drop-down menu
. -
Move the cursor to the position of interest.
-
Right-click the desired signal in the signal list and select Copy contents.
The content of the visible columns and columns header are copied in the clipboard.
To change the number of decimals of the cursor's tooltips
The number of decimals of the cursor tooltip is defined by the number of decimals for the respective signal. For more information, see To change the number of decimals.
To send the cursor time to EHANDBOOK-NAVIGATOR
If V8.7 is connected to EHANDBOOK-NAVIGATOR, the cursor time is automatically sent to EHANDBOOK-NAVIGATOR each time you change the cursor’s position. For more information on how to establish a connection to EHANDBOOK-NAVIGATOR, see Connecting MDA to EHANDBOOK-NAVIGATOR.
To move the cursor to a specific value
The time position for a cursor can be entered directly after a mouse click or using CTRL+SHIFT+B. As a result the cursor will move to the entered point in time. To access the time position field of the other cursor use again CTRL+SHIFT+B or TAB as long as the time position field is in edit mode.