Add/Edit Command
Optimization step > Sequence tab > Add/Edit Command
The Add/Edit Command (to/in Sequence <sequence name>) window contains the following elements:
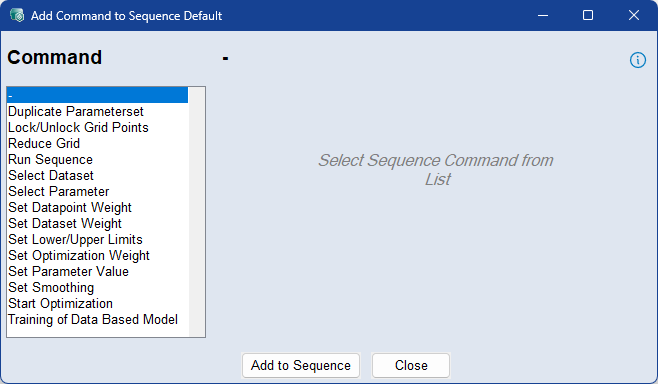
From the Command list, select one of the following commands to add:
 Duplicate Parameterset
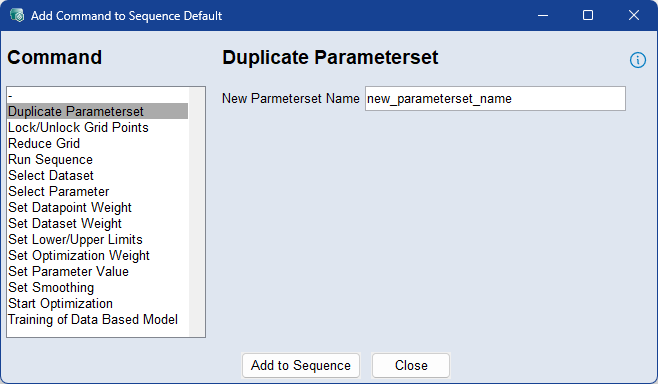
Enter a name for the new parameterset.
The currently active parameterset and its parameter values will be duplicated.
Lock Grid Points without Data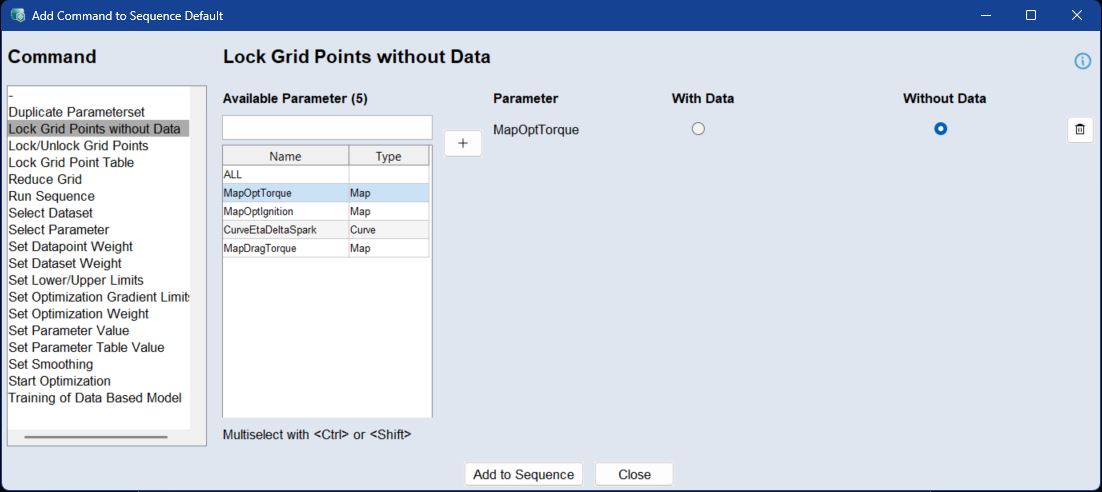
Use the Lock Grid Points without Data command to lock grid points of selected lookup tables depending on whether data is available at the grid point. Locking prevents the optimizer from modifying these grid points during the optimization process. All grid points that do not match the selected option are unlocked.
To apply locking, select one or more parameters from the Available Parameter list and click  to add them to the command. For each added parameter, select one of the following options:
With Data: Locks all grid points with data. Grid points without data are unlocked.
Without Data: Locks all grid points without data. Grid points with data are unlocked.
Lock/Unlock Grid Points

Use the Lock/Unlock Grid Points command to define specific regions of lookup tables (maps or curves) that should be locked or unlocked during the optimization process. Locking prevents the optimizer from modifying values within the defined region.
Specific values can be targeted by entering start and end values along each axis (X, Y, Z1, Z2, etc.), depending on the dimensionality of the parameter. Use -Inf and Inf to define an entire axis range
To apply locking, select the parameters, define the appropriate ranges, and activate the Lock checkbox. Unchecking the box will unlock the range for optimization. All axes of a parameter must have defined ranges for the configuration to be valid. You can use the standard Ctrl/Shift selection functions in the table
|
Note |
|---|
|
Combining the Lock Grid Point Table command with the Lock/Unlock Grid Points command is not recommended. The Lock/Unlock Grid Points command works additively, while the Lock Grid Point Table command locks only the selected grid points and unlocks all other grid points. If both commands are used directly after each other, the Lock Grid Point Table command can overwrite the result of the Lock/Unlock Grid Points command. |
Lock Grid Point Table
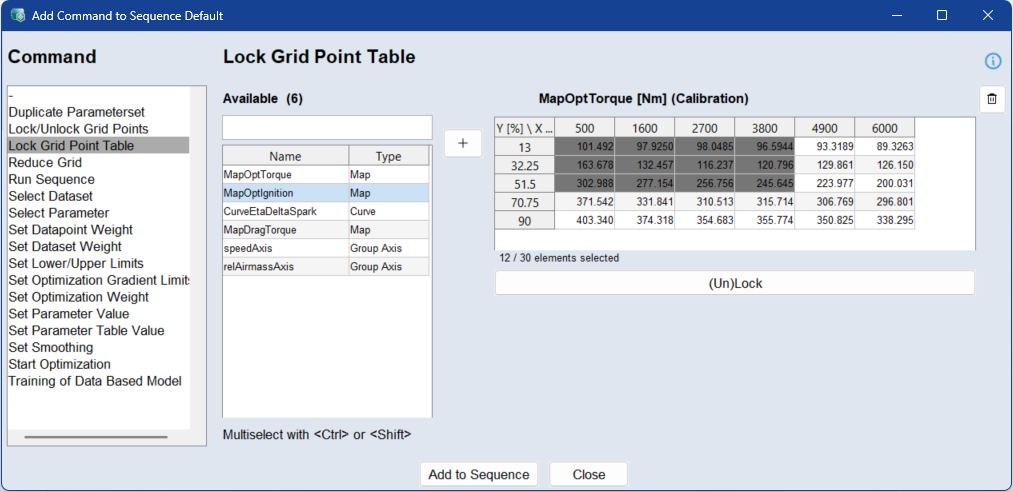
Use the Lock Grid Point Table command to lock or unlock individual grid points of lookup tables during the optimization process. Locking prevents the optimizer from modifying the selected grid points.
Unlike the Lock/Unlock Grid Points command, which uses axis ranges to define a region, this command lets you select the grid points directly in a table.
To apply locking, select a parameter and click to add it to the command. The current lock state from the project is applied to the table. Locked grid points are displayed in gray.
Select the grid points that you want to lock. You can use the standard Ctrl/Shift selection functions in the table
All grid points that are not selected are unlocked.
The selected grid points are stored with their exact axis values, not with their table indices. This allows the grid points to be identified even if the table structure changes, for example after grid reduction or group axis changes.
If a grid point specified in the sequence command does not exist when the sequence is executed, a warning is displayed. No grid points are locked for the affected parameter and the sequence continues.
|
Note |
|---|
|
Combining the Lock Grid Point Table command with the Lock/Unlock Grid Points command is not recommended. The Lock/Unlock Grid Points command works additively, while the Lock Grid Point Table command locks only the selected grid points and unlocks all other grid points. If both commands are used directly after each other, the Lock Grid Point Table command can overwrite the result of the Lock/Unlock Grid Points command. |
Reduce Grid
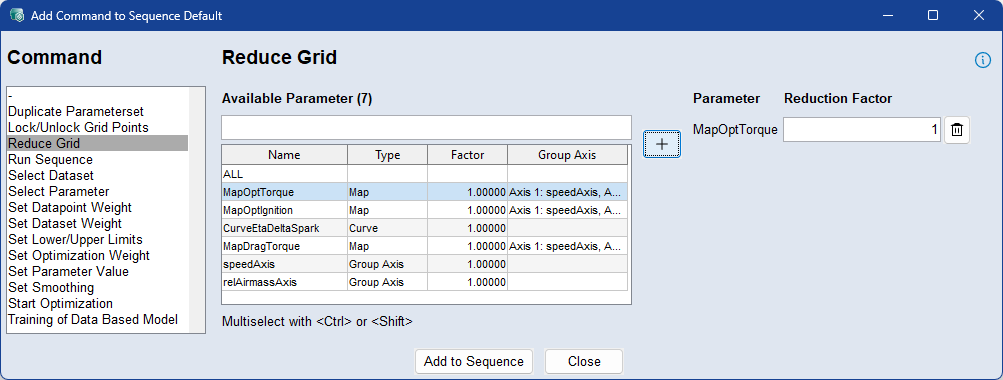
Use the Reduce Grid command to define reduction factors for individual parameters or group axes, effectively lowering the number of grid points used during optimization. This can significantly speed up optimization by reducing the computational load.
To apply reduction, select the parameters from the list and enter the desired reduction factor for each one. You can use the standard Ctrl/Shift selection functions in the table
The reduction factor is applied to each axis of the parameter and always operates on the original grid—regardless of any previously applied reductions. For example, a 10×6 map with a reduction factor of 2 results in a 5×3 grid, meaning only 15 values are optimized instead of 60. A reduction factor of 1 restores the parameter to its original grid.
If a parameter uses group axes, only its individual (non-group) axes are reduced. To also reduce group axes, they must be selected and configured separately. After the optimization finishes, the original parameter grid is automatically restored.
Run Sequence
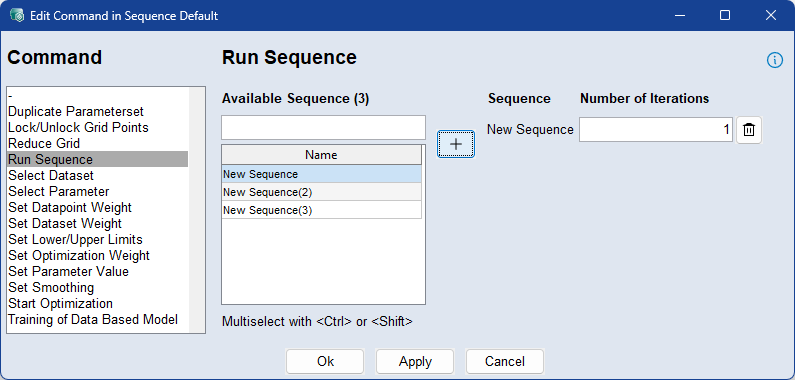
Use the Run Sequence command to call another sequence from within the current sequence. This allows you to modularize workflows by nesting reusable sequences inside one another.
To add a sequence, select it from the list and define the number of iterations to repeat it. The specified sequence will then run the given number of times as part of the overall command flow. Multiple sequences can be added, and each can have its own iteration setting.
Select Dataset
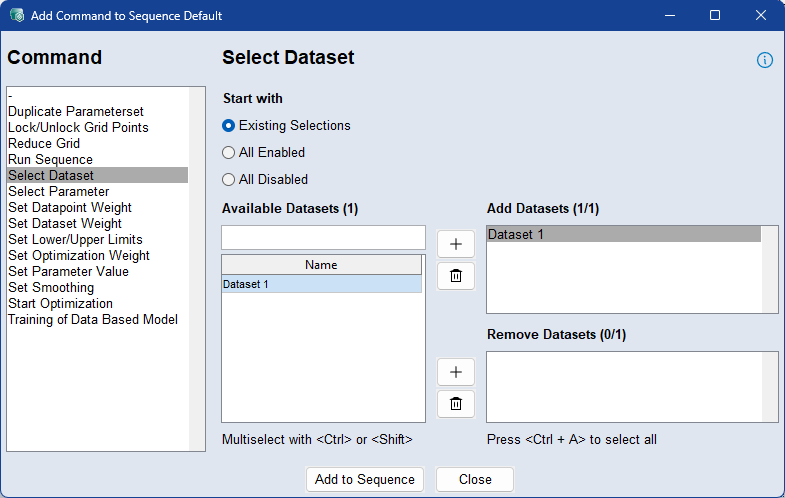
Use the Select Dataset command to activate or deactivate specific training datasets for optimization. This allows you to control which datasets contribute to the optimization process at different stages in the sequence.
Select how the sequence should start:
Existing Selection: All datasets with non-zero dataset weights are enabled.
All Enabled: All available datasets enabled.
All Disabled: All datasets disabled.
To add datasets to the optimization, select them in the Available Datasets list and click the button next to the Add Datasets list.
To remove parameters from the optimization, select them in the Available Datasets list and click the button next to the Remove Datasets list.
To delete parameters form the Add/Remove Datasets list, select them and click the  button.
Select Parameter
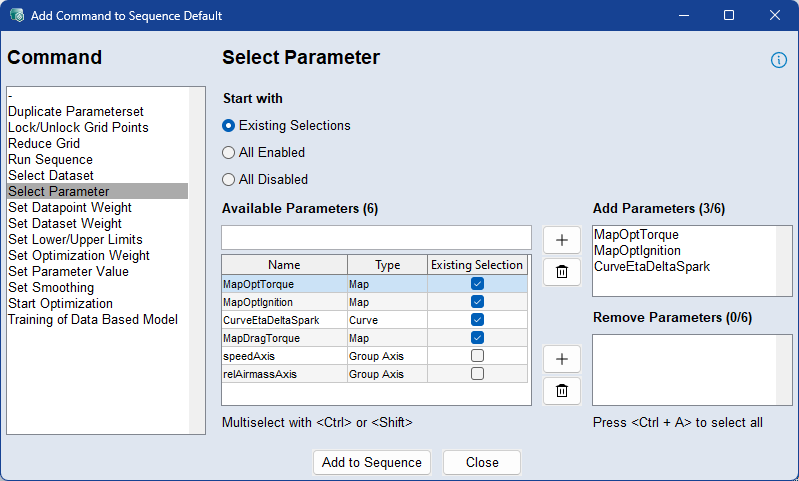
Parameters can be either active or inactive for optimization.
Select how the sequence should start:
Existing Selection: Uses the currently enabled parameters from the Optimize column in the Optimize tab.
All Enabled: All parameters enabled.
All Disabled: All parameters disabled
You can also manually define optimization states using zeros and ones. For example, to optimize only a single parameter:
Select All, 0; Curve, 1.
To add parameters to the optimization, select them in the Available Parameters list and click the button next to the Add Parameters list.
To remove parameters from the optimization, select them in the Available Parameters list and click the button next to the Remove Parameters list.
To delete parameters form the Add/Remove Parameters list, select them and click the button.
Set Datapoint Weight
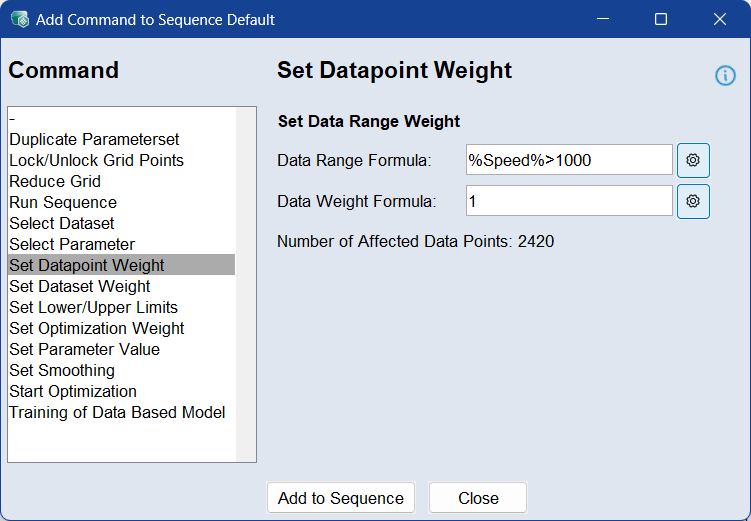
Use the Set Datapoint Weight command to assign individual weights to data rows across all datasets. This allows finer control over which data points influence the optimization process more or less.
To apply datapoint weights, define a Data Range Formula , and enter a Data Weight Formula. For more information, see Data Step >Rows Weight. The number of affected data points is displayed below the input fields.
Set Dataset Weight
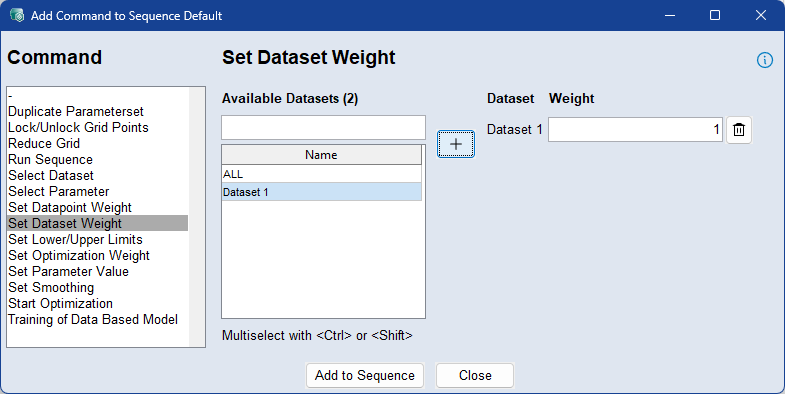
Use the Set Dataset Weight command to assign weights to individual training datasets or all datasets involved in the optimization. This determines how strongly each dataset influences the optimization result.
To apply dataset weights, select one or more datasets from the list, click , and enter a value in the range [0, 1000]. You can use the standard Ctrl/Shift selection functions in the table
A weight of 0 disables the dataset, while higher values increase its impact proportionally—for example, a dataset with weight 2 is weighted twice as much as one with weight 1. The sequence starts with the dataset weights defined in the Data step, and this command can be used to adjust them dynamically at specific points within the sequence.
Set Lower/Upper Limits
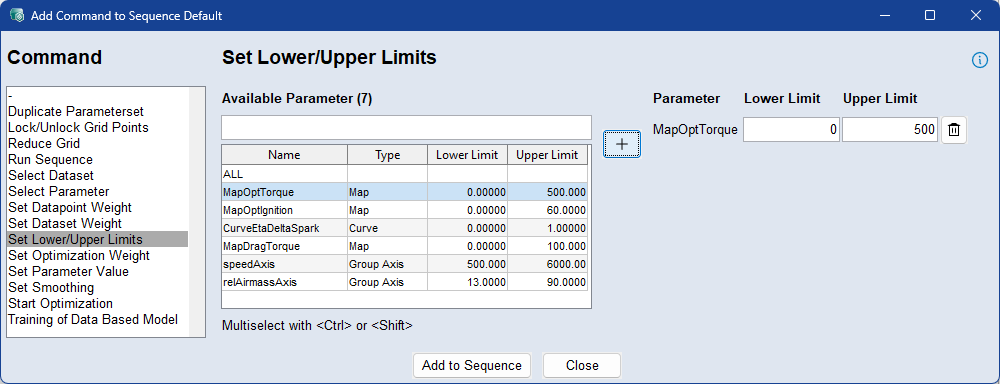
Use the Set Lower/Upper Limits command to define temporary upper and lower limits for the Z values of selected parameters during optimization. These limits constrain the range within which the optimizer can adjust parameter values.
To apply limits, select one or more parameters from the list, click , and enter the desired lower and upper bounds. The limits affect only the Z values (not the axes) and apply for the duration of the sequence. These changes are temporary and will be automatically reverted once the optimization sequence is finished.
Set Optimization Gradient Limits
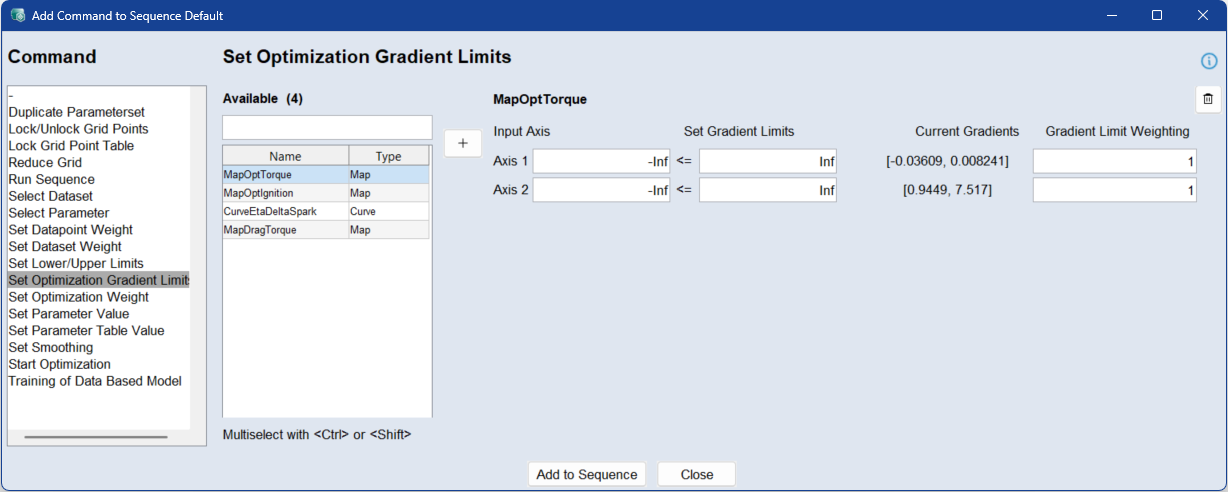
Use the Set Optimization Gradient Limits command to change the gradient limits and gradient limit weighting of selected parameters during the optimization process.
Gradient limits restrict the gradient values of a parameter in the input axis directions. The current gradient values are displayed for reference.
To apply gradient limits, select the parameters and enter the lower and upper gradient limits for each input axis. Values from -Inf to Inf are valid. Use -Inf and Inf to define an unrestricted gradient range. If a gradient limit field is left empty, the current value remains unchanged.
You can also enter a gradient limit weighting for each input axis. The weighting defines the priority of the gradient limit constraint in relation to the primary optimization criteria. Values from 0 to Inf are valid. A high value makes the gradient limit more important, and a low value makes it less important. If a weighting field is left empty, the current value remains unchanged.
Set Optimization Weight
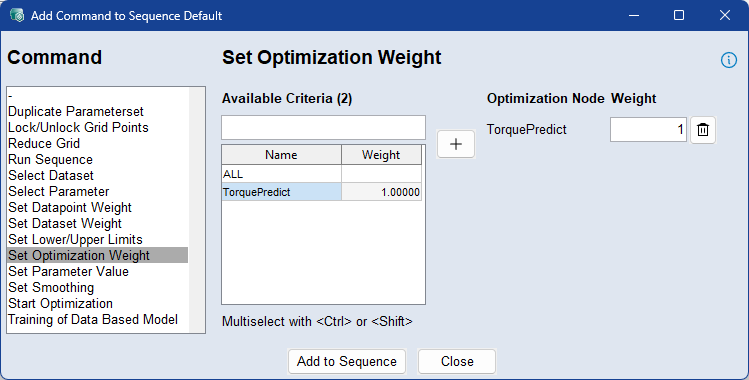
Use the Set Optimization Weight command to define weights for individual or all optimization criteria. This allows you to control the influence of each criterion during optimization.
To apply weights, select a criterion from the list, click , and enter the desired weight. A value of 0 disables the criterion, while higher values increase its impact relative to others.
Set Parameter Value
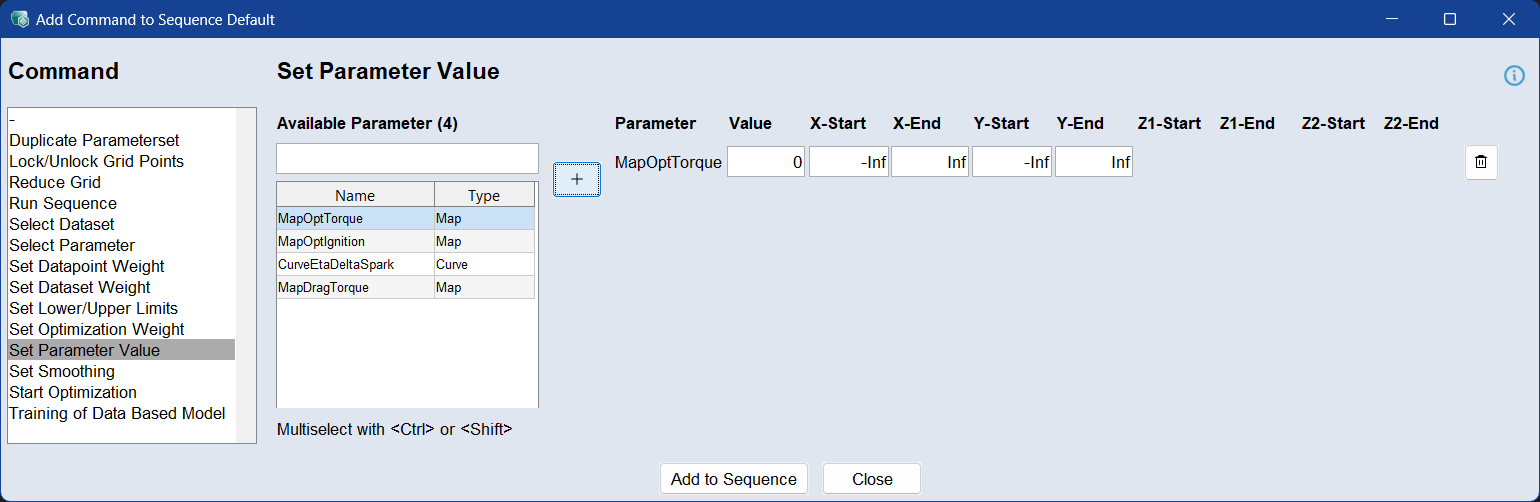
Use the Set Parameter Value command to assign a specific value to a parameter or a defined region of a parameter during the sequence. This allows direct control over parameter contents at any step in the optimization flow.
To apply a value, select the parameter from the list, click , enter the desired value, and define the region using start and end values for each axis.
For lookup tables (maps or curves), the region must fall within the range of the parameter’s breakpoints. To target the entire range of an axis, use -Inf and Inf as start and end values. For example, in a map with an X-axis range from 500 to 6000, a valid input might be -Inf to 4000.
Set Smoothing
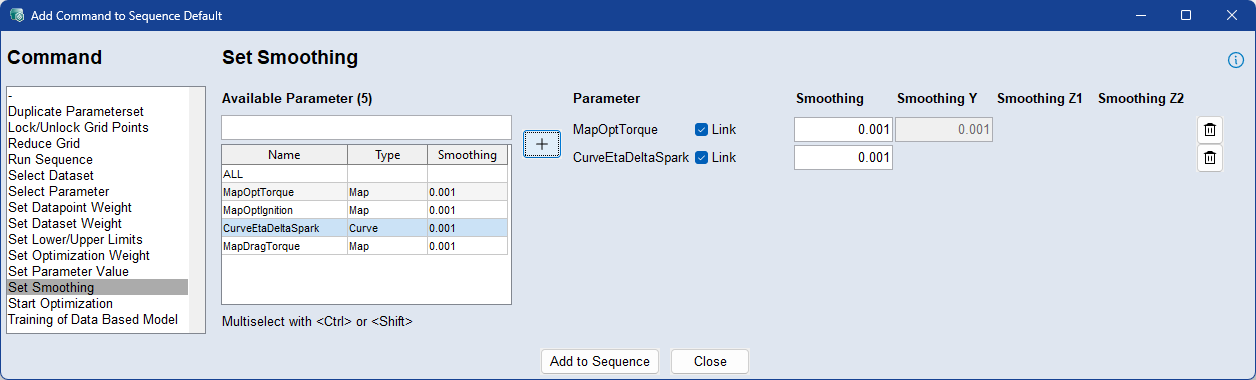
Use the Set Smoothing command to define smoothing factors for individual parameters during optimization. Smoothing helps ensure that parameter values change gradually across the grid, improving result stability and model behavior.
To apply smoothing, select one or more parameters from the list, click , and enter a smoothing factor. The entered value will be applied to all axes of the parameter.
To set different smoothing values per axis, deactivate the Link checkbox and fill in each of the axis-specific fields (e.g., X, Y, Z1, Z2). If axis-specific smoothing is used, all relevant fields must be filled - partial input (e.g., only two values for a 3D parameter) is not allowed.
Start Optimization
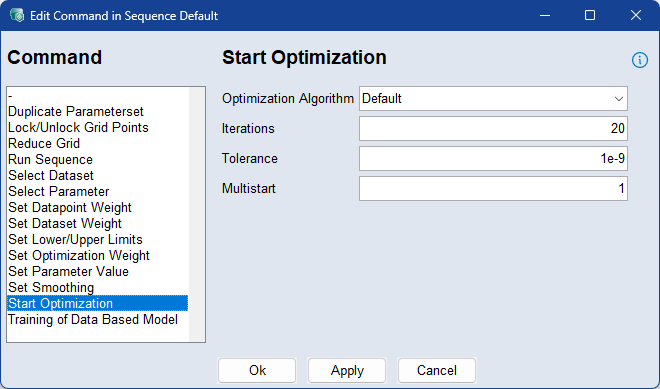
Use the Start Optimization command to configure and start the optimization process. This step defines the optimization algorithm and its key settings for the sequence.
To apply the start optimization command, select the algorithm, enter the maximum number of iterations, the stopping tolerance, and the number of optimization runs (Multistart). These fields correspond to the Optimization Options in the Optimize step and control how thoroughly and precisely the optimizer searches for a solution.
For more information, see Optimizer Options
Training of Data Based Model

Use the Training of Data Based Model command to retrain a data-based model during the execution of a sequence. This allows the model to be updated dynamically as new or modified data becomes available throughout the optimization process.
To retrain a model, select it from the list and add it to the sequence. The selected model will be retrained at that step using the current dataset and configuration. Multiple models can be selected and triggered for training within the same step. For more information, see Data Based Modelling Step.
See also