Using the Switch
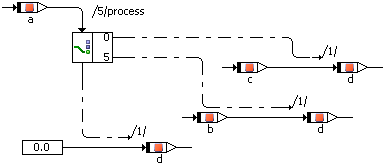
From the No. of arguments combo box of the Basic Blocks palette or toolbar, select the number of branches for the switch.
You must select at least two branches. The default branch is not counted. You can adjust the number of branches later via the Add Condition and Remove Condition options in the context menu of the Switch block.
- Click the
 Switch button to load the mouse cursor with the respective block.
 - Place the block in the drawing area.
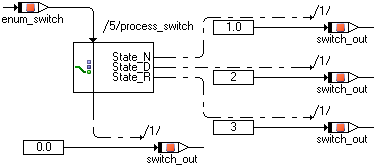
To change the values for the alternative branches, right-click the block and select Edit Literals from the context menu.
An editor window opens, it contains one input field for each branch.
In the Literals field, enter the values for the branches.
You can enter either positive integers or enumerator names.
Click OK to accept the changes.
Connect the input at the top of the block to a limitInt or wrapInt (sdisc or udisc) element or to an enumeration.
Note
If you connect the input to a cont pin, an error (MMdl63) is displayed during code generation.
The limits of the input element must contain all values of the branches. If they do not, an error (MMdl71) is displayed during code generation.
- Specify the actions for the branches.
- Right-click the sequence call you want to connect to a branch, and select Connector from the context menu.
Connect the desired branch to the connector.
You can connect a branch to more than one actions. In that case, edit the connector numbers (according to Editing a Sequence Call in the Sequence Editor). As for sequence calls, each number must be unique.
- Repeat these actions for the other branches.
See also